LIFTING GUIDE

How to Assemble a Modular Spreader Beam

Step-by-step instructions for safe assembly, configuration and rigging of modular spreader beam systems.

Modular spreader beam assembly guide

How do you assemble a modular spreader beam?

Knowing how to assemble a spreader beam correctly is essential for safe lifting operations. This guide explains how to assemble a modular spreader beam system step by step.

Correct assembly of a modular spreader beam is essential to ensure safe lifting operations, maintain rated capacity, and prevent structural or rigging failure.

This guide outlines the correct procedure for assembling a modular spreader beam system in accordance with manufacturer recommendations and best practice lifting standards.

01
Pre-Assembly Inspection

Check Components Before Assembly

Before assembly begins, confirm that all components are available and in suitable condition.

  • Check all components against the delivery note
  • Inspect for visible damage, defects or wear
  • Ensure all parts are clean and fit for use
Important

Failure to identify damaged or missing components can compromise the integrity of the entire lifting system.

02
Configuration & Capacity

Confirm Configuration and Capacity

Before connecting any components, the planned configuration should be checked against the lift plan and relevant load chart.

  • Verify beam configuration against the lift plan
  • Check span, sling angles and working load limit (WLL)
  • Refer to the relevant load chart
Important

Incorrect configuration can reduce capacity and create unsafe lifting conditions.

03
Beam Assembly

Beam Assembly (Flange Connection)

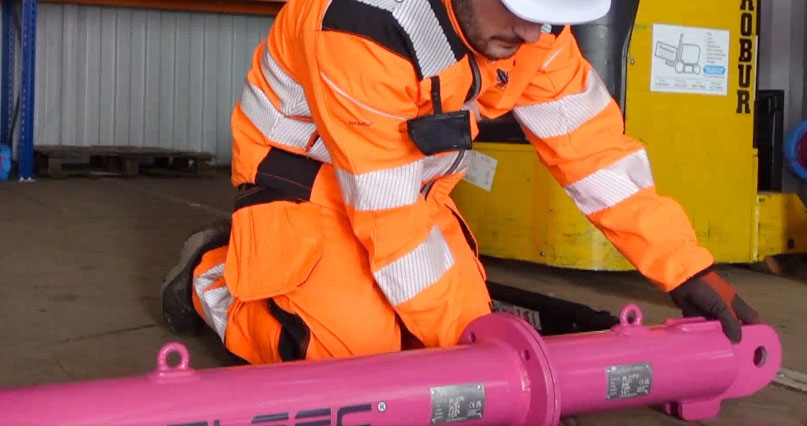
The beam sections are connected using bolted flange joints. Correct alignment and bolt installation are essential to maintain structural integrity and rated capacity.

1

Inspect Flange Faces

Ensure all flange faces are clean and free from debris, contamination or damage before assembly begins.

Inspect flange faces
2

Align Bolt Holes

Position the beam sections together and align the flange faces and bolt holes correctly before inserting bolts.

Align bolt holes
3

Install Bolts

Insert all supplied bolts once alignment has been achieved. Ensure correct positioning and full engagement.

Install flange bolts
Important

All flange bolts must be installed and tightened in accordance with the manufacturer's specified torque values before the beam is placed into service.

04
Top Rigging Connection

Attach Top Shackles and Slings

Attach the lifting slings to the top shackles.

  • Position drop links into the lifting lug clevis
  • Align clevis and lug holes correctly
  • Insert shackle pin through aligned holes
  • Secure using shackle nut and safety pin
Important

Ensure all connections are correctly seated and fully secured before lifting.

Top rigging connection on modular spreader beam
05
Lifting & Rigging Setup

Raise the Beam

Lift the assembled beam using a suitable lifting device and ensure the lift remains controlled and stable throughout the operation.

  • Attach the top rigging arrangement
  • Raise the beam clear of the ground
  • Confirm the beam is level and stable
  • Connect the lower rigging arrangement
  • Verify all connections before proceeding
Important

The beam should remain stable and properly supported during rigging. Avoid shock loading or sudden movements.

Raise beam and connect bottom rigging
06
Lower Rigging & Sling Angles

Attach Lower Rigging

Connect the lower rigging to the beam once the assembled system has been raised and is stable.

  • Connect rigging to the lower shackles
  • Fit shackles into the lower hole of the drop link
  • Confirm all shackle pins are correctly secured
Critical Sling Angles
  • Drop links must remain vertical
  • Lower sling angle must not exceed 6°
  • Top sling angle must not exceed 45° to the vertical

Exceeding these limits can reduce lifting capacity and introduce unsafe loading conditions.

Attach lower rigging and check sling angles
07
Final Inspection

Inspect the Assembled System Before Use

Before the spreader beam is placed into service, the completed assembly should be inspected to confirm that all components have been correctly installed, configured and secured.

  • Confirm all bolts are installed and torqued correctly
  • Verify all shackles and rigging connections are secure
  • Check sling angles are within allowable limits
  • Ensure drop links remain vertical
  • Verify the assembled configuration matches the lift plan
  • Confirm the working load limit has not been exceeded
Final Check

The assembled system should be examined by a competent person before use and verified against the relevant lift plan, load chart and manufacturer instructions.

Ready For Lifting Operations

Once all inspections have been completed and the assembly has been verified, the modular spreader beam system is ready for lifting operations in accordance with the approved lifting plan.

This guide should always be used alongside official manufacturer instructions, approved lift plans and applicable lifting regulations.
Final Guidance

Common Assembly Mistakes & Safety Checks

Correct assembly is essential for maintaining rated capacity, safe load distribution and compliance with lifting requirements.

Common Assembly Mistakes

Incorrect Bolt Torque

Can lead to joint failure or uneven load distribution.

Misaligned Flanges

May damage components and reduce structural integrity.

Incorrect Sling Angles

Reduces working load limit and introduces unsafe forces.

Skipping Pre-Use Inspection

Increases risk and breaches lifting regulations.

Why Correct Assembly Matters

Modular spreader beam systems are engineered for performance — but only when assembled correctly.

  • Safe load distribution
  • Full utilisation of rated capacity
  • Compliance with lifting regulations
  • Reduced risk of equipment failure
View Modular Spreader Beams →
FAQs

Modular Spreader Beam Assembly FAQs

How do you assemble a modular spreader beam?

A modular spreader beam is assembled by checking components, confirming the correct configuration, aligning flange connections, installing and torquing bolts, attaching top and bottom rigging, checking sling angles and inspecting the system before use.

Do spreader beams require torque settings?

Yes. Bolted flange connections should be tightened to the manufacturer’s specified torque values using suitable calibrated equipment.

What should be checked before assembling a spreader beam?

All components should be checked against the delivery note, inspected for visible damage and confirmed as clean, complete and fit for use before assembly begins.

Why is the load chart important when assembling a modular spreader beam?

The load chart confirms the correct configuration, span, sling angle and working load limit for the planned lift. Incorrect configuration can reduce capacity and create unsafe lifting conditions.

What is the maximum sling angle for a spreader beam?

Sling angle limits depend on the beam configuration and manufacturer’s load chart. For this assembly process, the top sling angle must not exceed 45° to the vertical and lower sling angles must remain within specified limits.

Why must drop links remain vertical?

Drop links must remain vertical to ensure the load is transferred correctly through the spreader beam system. Incorrect drop-link positioning can introduce unsafe loading conditions.

Does a spreader beam need inspection before use?

Yes. The assembled system should be inspected by a competent person before use and checked against the lift plan, load chart and manufacturer instructions.

Can a modular spreader beam be assembled without a lift plan?

No. Assembly should always be carried out in accordance with an approved lift plan, manufacturer instructions and the relevant load chart.

Modular Spreader Beams

Need a certified modular spreader beam system?

Explore Multisec modular spreader beams engineered for flexible lifting configurations, heavy lifting projects and safety-critical lifting operations.

View Spreader Beams →
Multisec
Privacy Overview

This website uses cookies so that we can provide you with the best user experience possible. Cookie information is stored in your browser and performs functions such as recognising you when you return to our website and helping our team to understand which sections of the website you find most interesting and useful.